
How to create attractive checkboxes for Excel and Word UserForms
Custom vs. Native Checkbox
I love UserForms, really I do. I develop a lot of add-ins for both Excel and Word which use lots of UserForms for users to interact with.
But the controls on UserForms are . . . “tired”.
In previous posts we talked about creating checkboxes and option buttons on your worksheet.
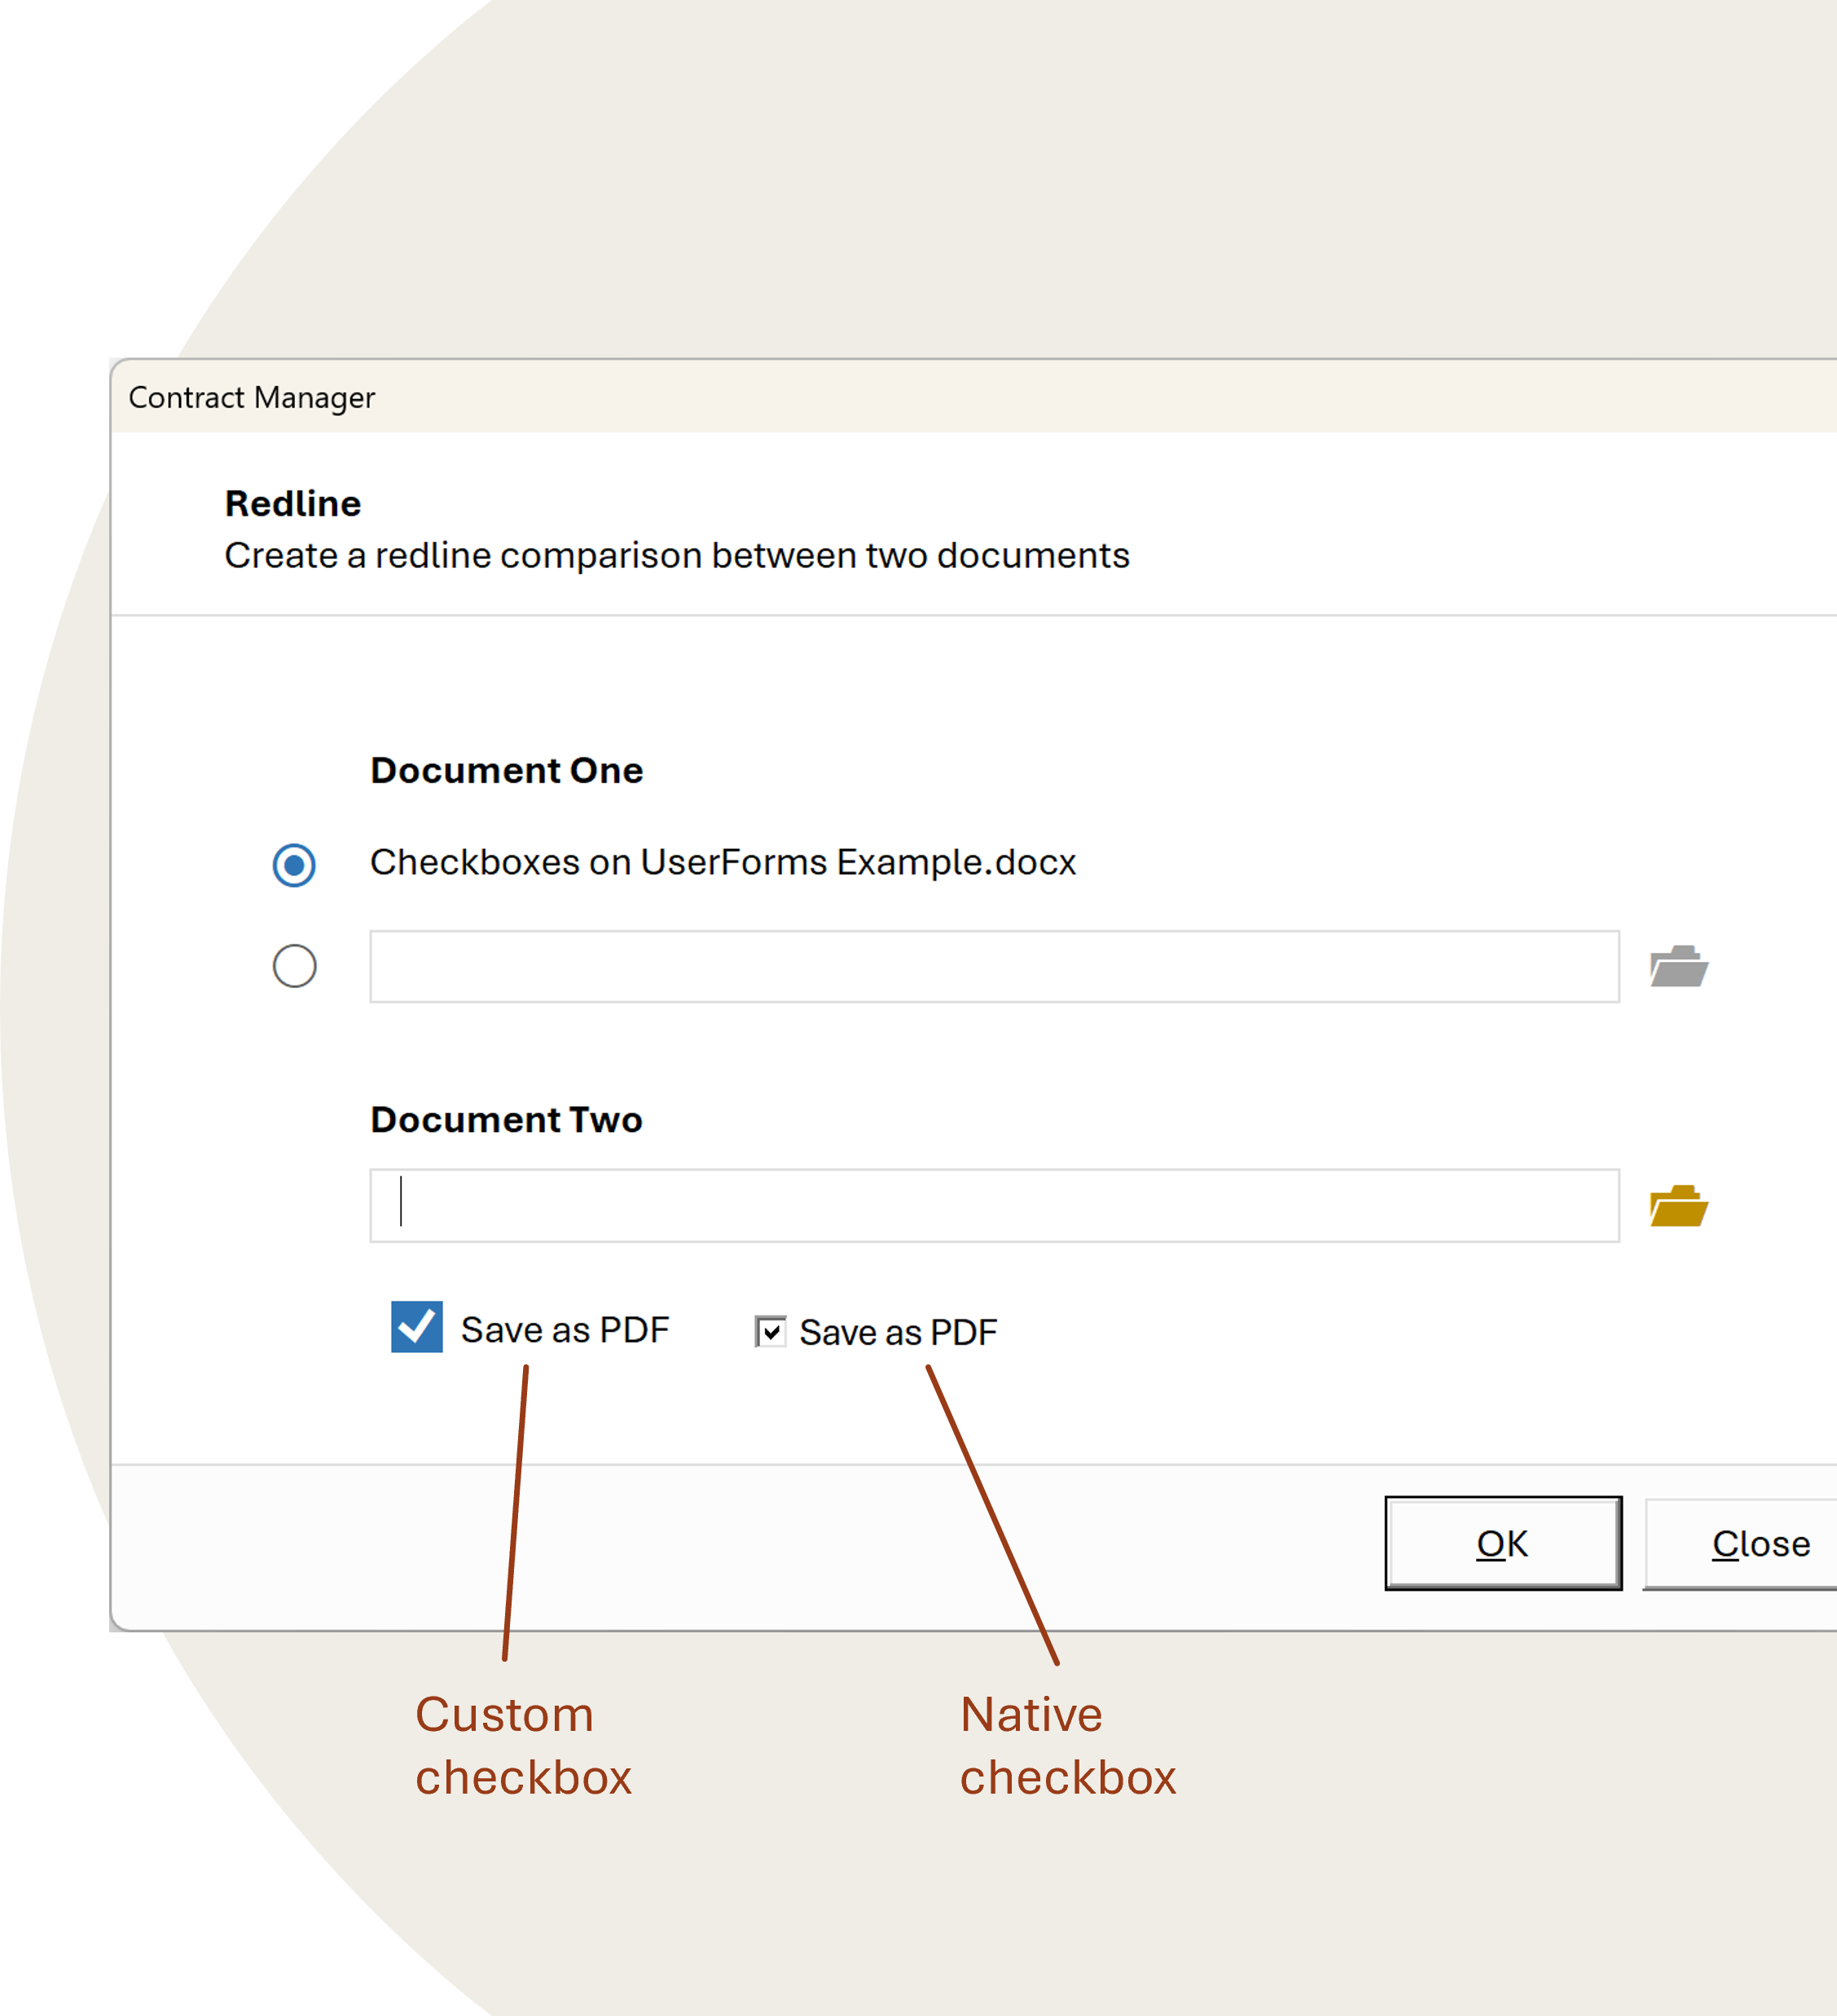
For a recent project I needed a checkbox on a UserForm.
Here’s an example showing the “custom” checkbox compared to the native checkbox you normally find on Excel Userforms. The custom is the blue one on the left in case you couldn’t tell 😐.
The native checkbox looks so; <sigh> 1980s. I’m surprised it’s not battleship grey.
Meanwhile, the custom checkbox, while blue, could be any colour you want. Also, any size and with a choice of “checks”. And it’s not created with bitmaps (images) which go grainy when you try to resize it.
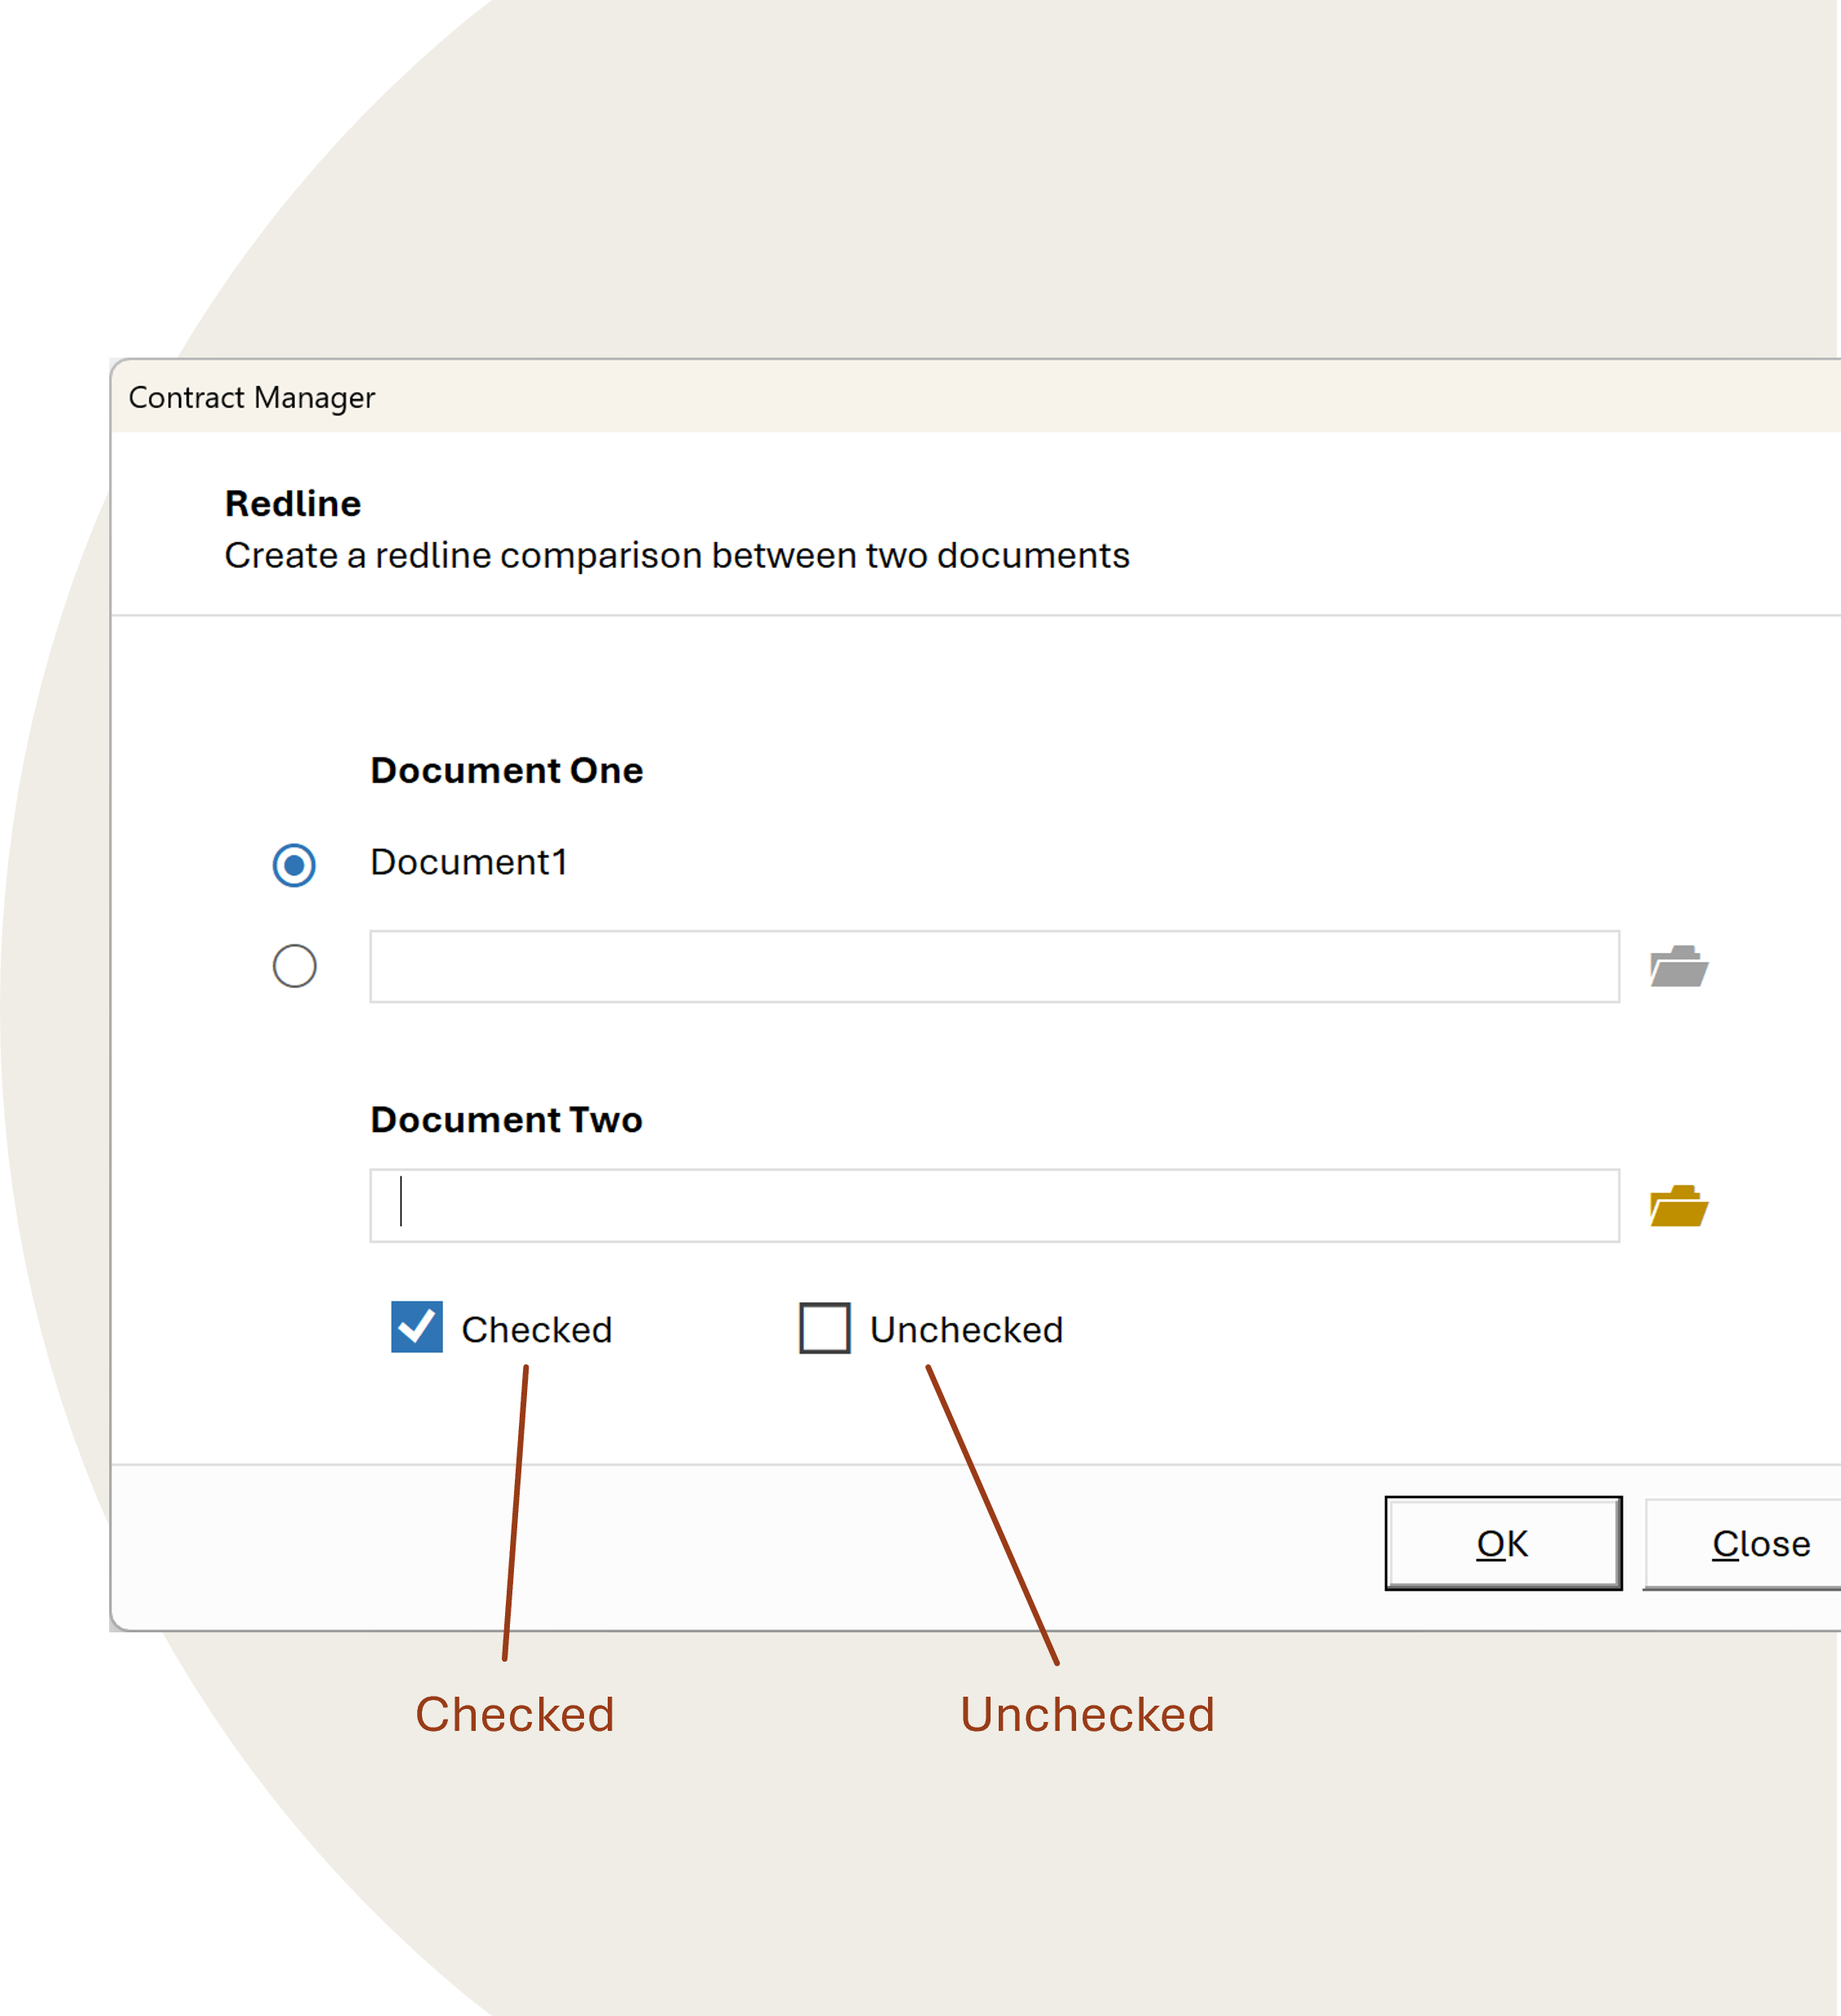
Checked & Unchecked
Here’s how the custom checkbox looks “checked” and “unchecked”.
The uncheck version can also be any colour you want.
Let’s see how you can create it . . .
Custom Checkbox Creation
The checkbox is made up of 6 standard Userform controls you can see on the pull-apart image below:
- 1First there’s a frame (or groupbox) which holds all the other shapes.
- 2Then there’s a label which displays the text or "caption"
- 3Third is a label with a rectangle □ which displays the control is “unchecked”. The rectangle is a character from the Segoe UI Symbol font. You can use Window’s Character Map to copy this or Excel’s Insert Symbol.
- 4Fourth and fifth are two labels – one with a solid rectangle displays when the control is checked and its corresponding check mark.
- 5Finally, sixth is a label which sits over all the other shapes. When the control is displayed this is transparent. The sole purpose of this label is to receive the “click”. This saves having to write code for the four other controls to know then the checkbox has been clicked.
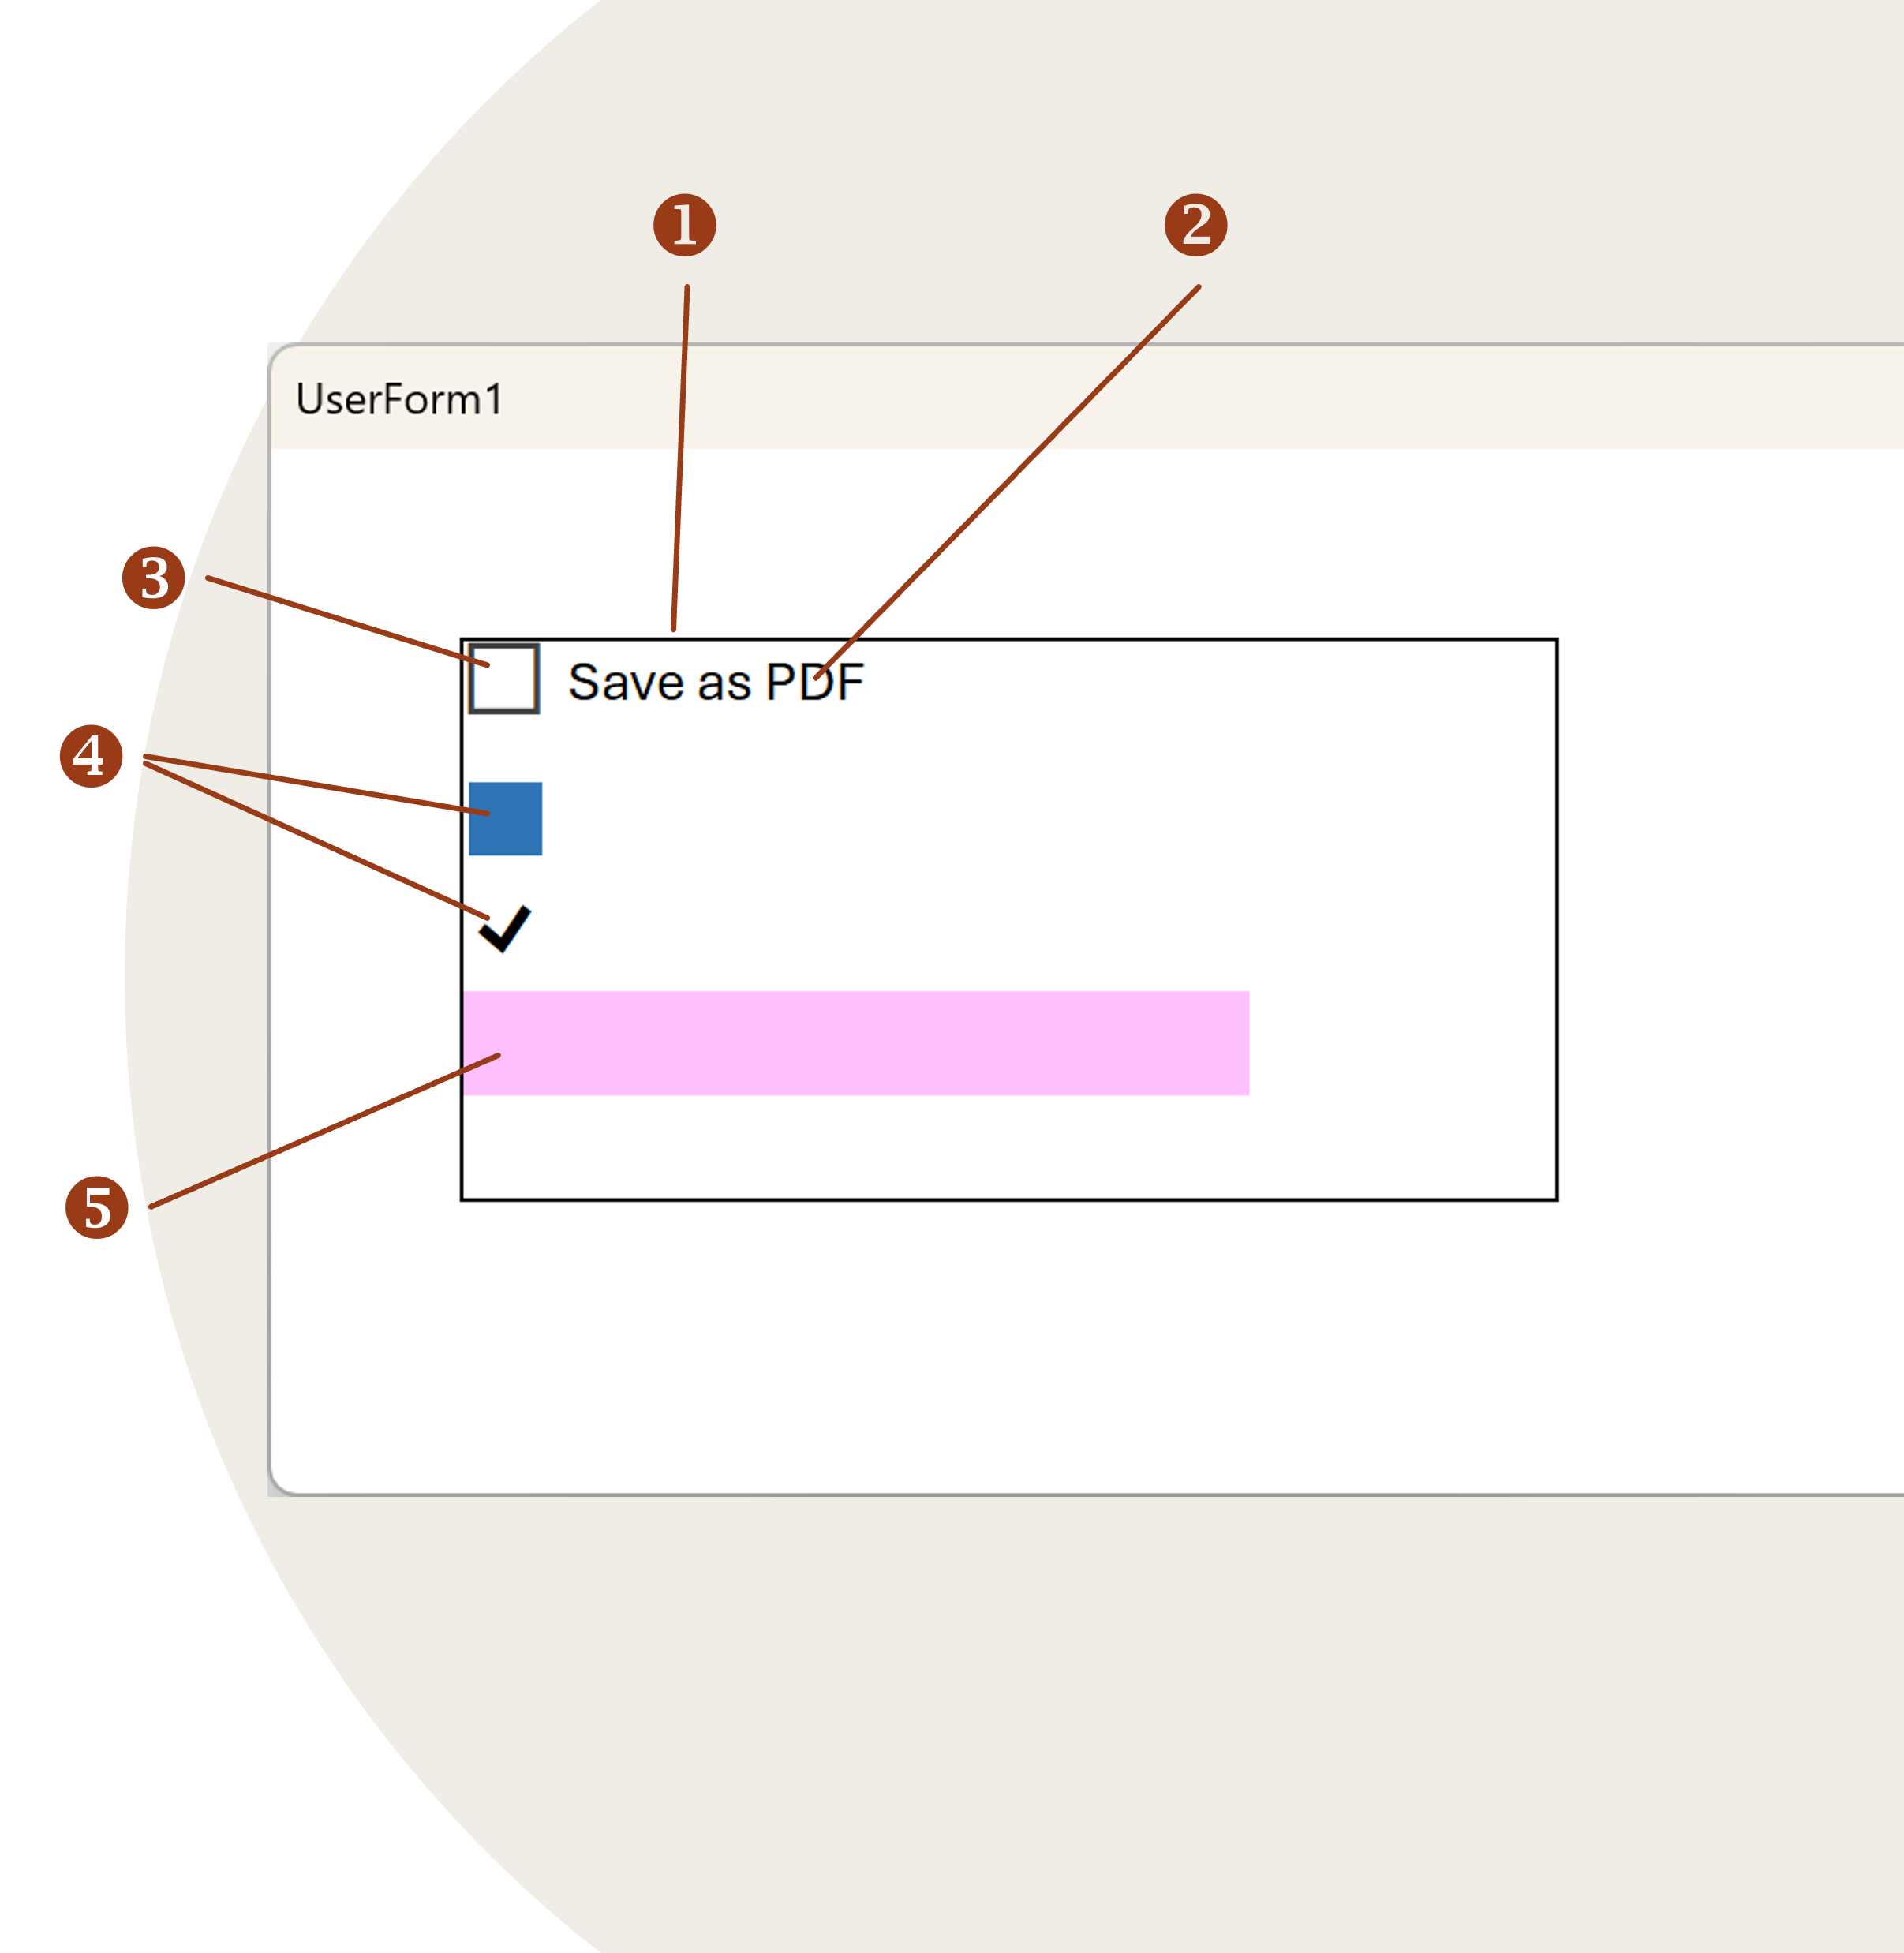
These controls are all position over each other and resized to “appear” like a single checkbox control.
Bringing it to life with VBA
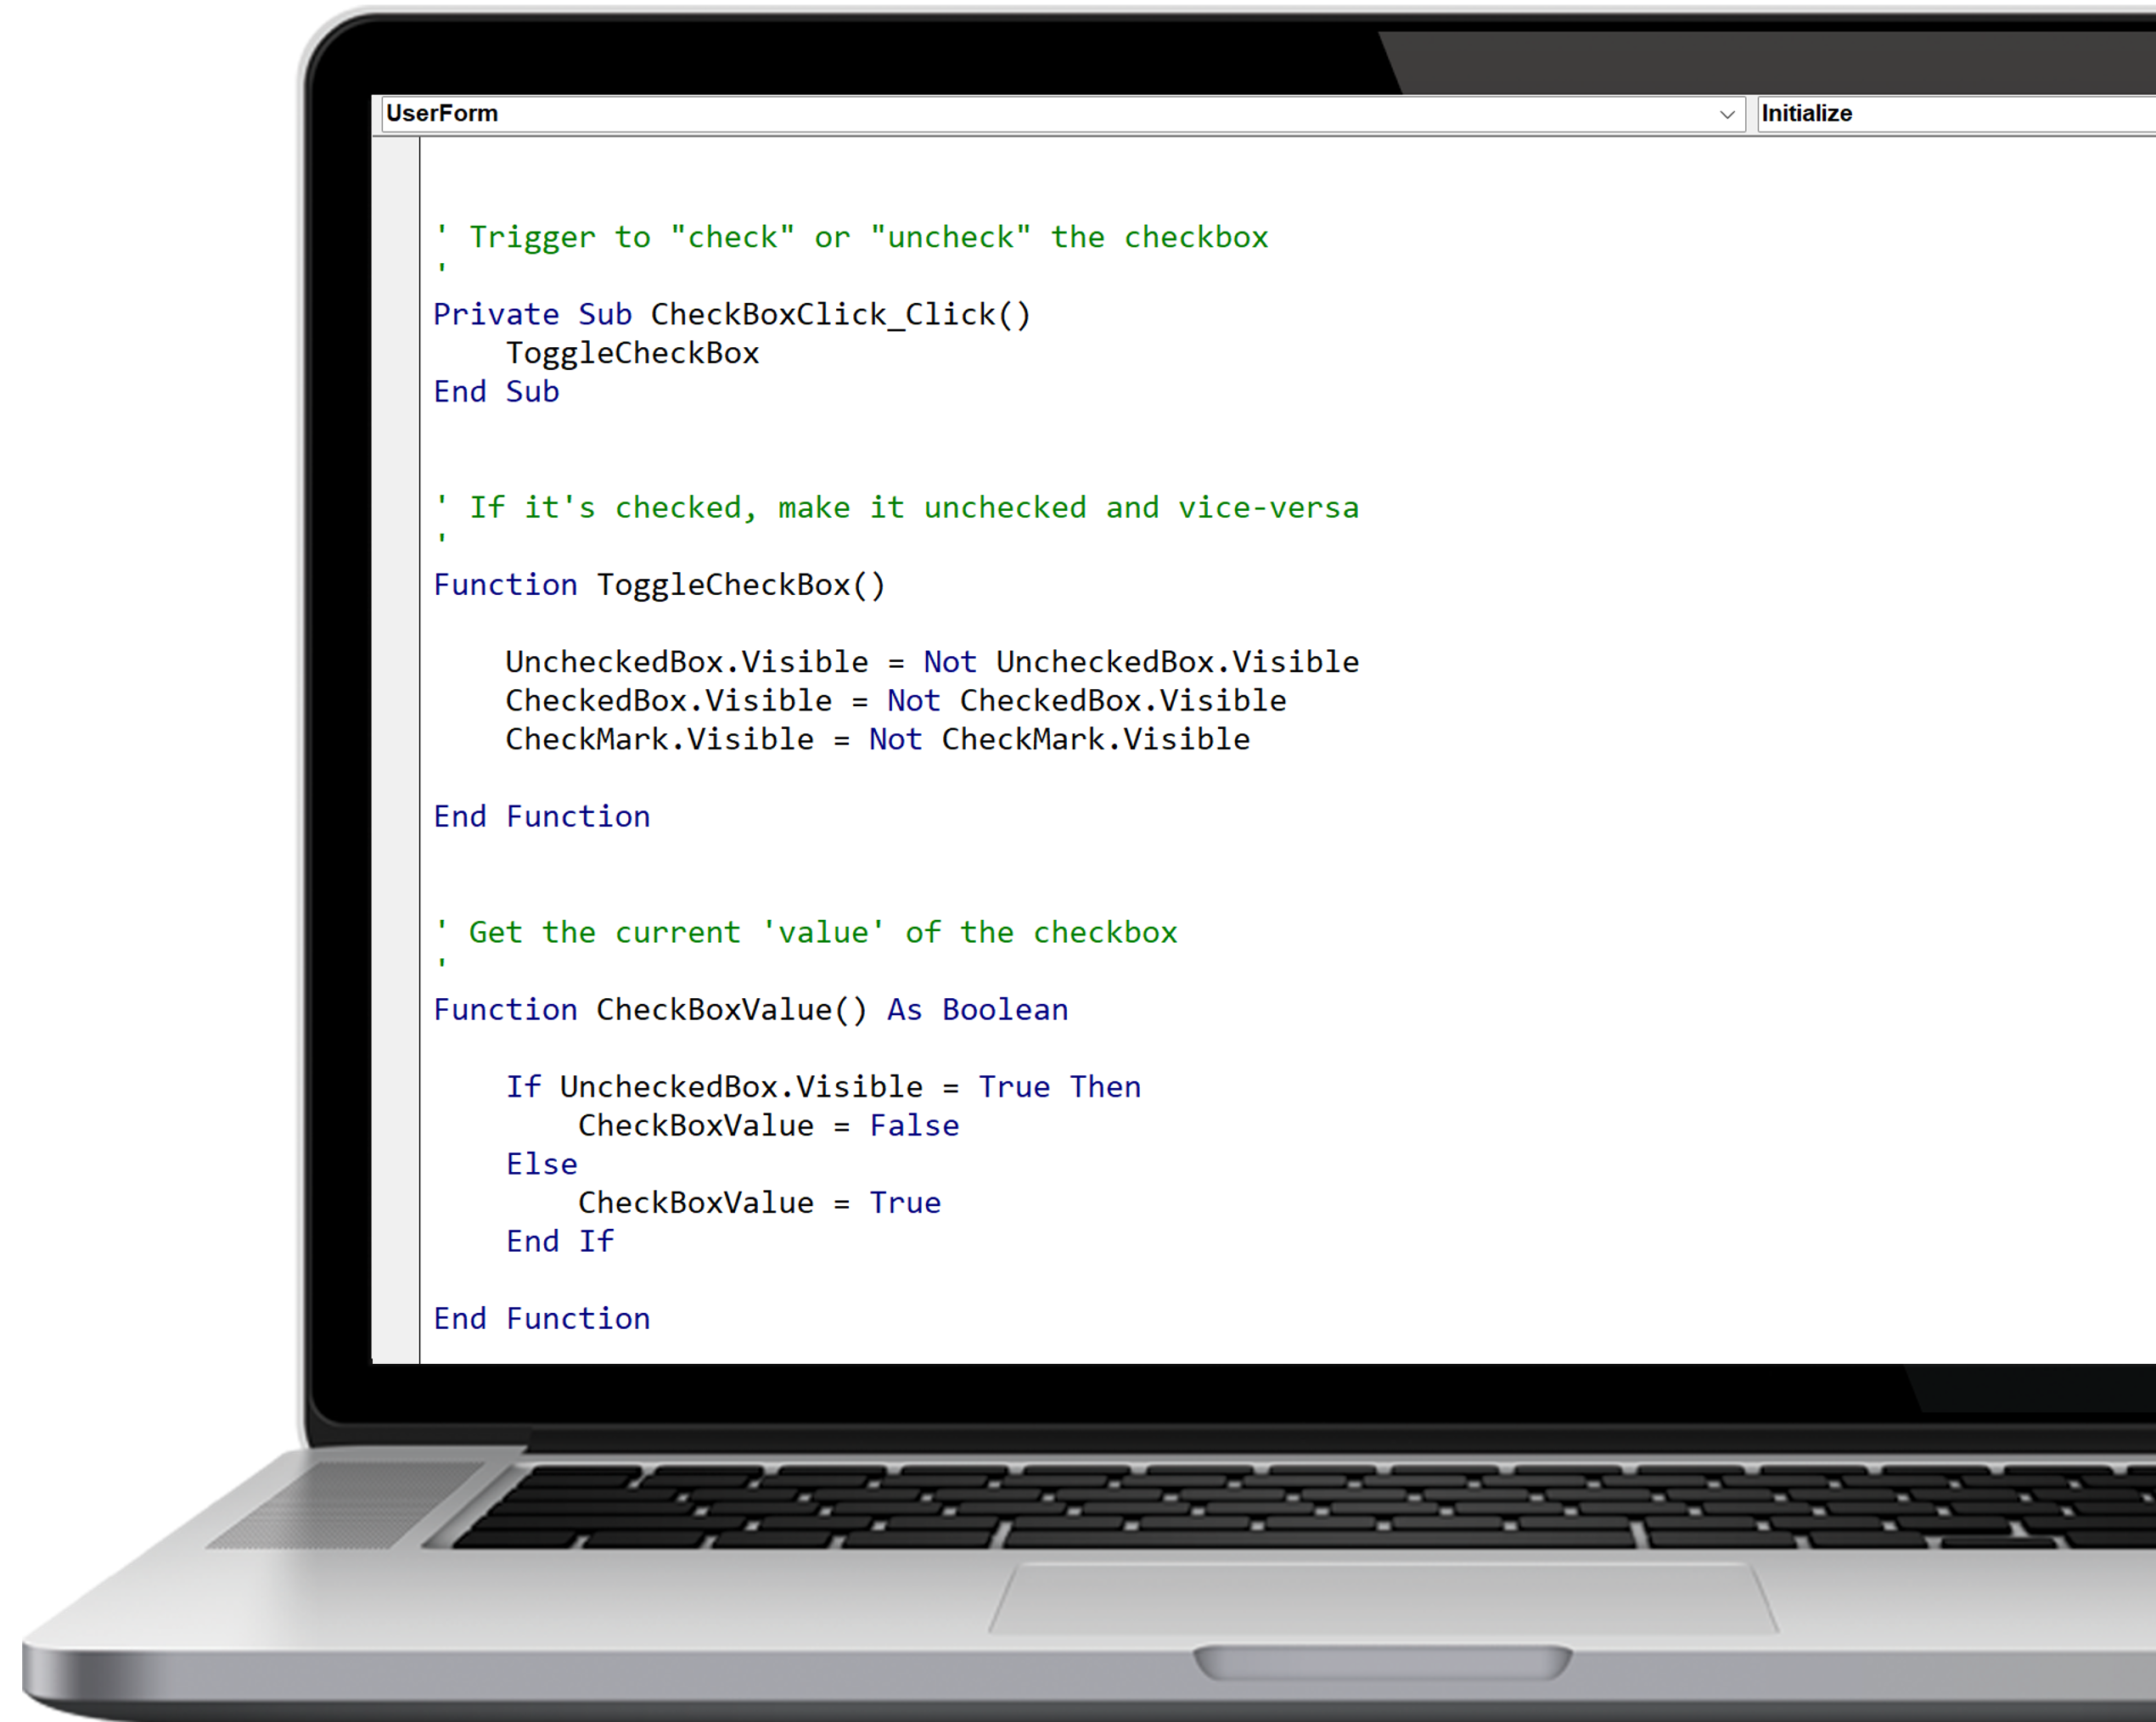
The checkbox just needs three snippets of code.
First, we want to do something when the checkbox is clicked. That’s handles by the first routine.
Second, we want the checkbox to respond to being clicked. If it’s checked, make it uncheck and vice-versa.
Here we just toggle the visible state of the different shapes to make it “look” checked or unchecked.
And finally, we want to know what the value is. If it’s checked the value is True, otherwise it’s False.
Conclusion
I put this example together quickly.
In reality, I’d wrap all the check code in a class, so I could have as many checkboxes on the form as required and they would all use the same code to handle checking and unchecking and storing their value.
How far have you gone to create your own custom controls? Let me know in the comments below.
0 comments